
One Pixel Cinema
Eyes Wide Shut. Say what you will about the film’s slow pace and dense symbolism – personally I don’t think it’s one of Kubrick’s best – but it is beautifully shot, and one of the most interesting studies in color and color temperature in film. Scene lighting is a constant interplay between comforting yellows and cold blues, with red, blue, and purple objects all prominently featured. But all that dialog, nudity, and general Tom Cruise-ness distracts from the film’s pure color brilliance, which is why I set out to distill Eyes Wide Shut to its color essence.

You will never see the whole picture, and it’s all you own fault.
Ever since converting Moby-Dick to a color stream for Blot’re, I’ve been thinking about converting other media as well. Film is an obvious fit. Movie are already streams, a new frame every one twenty-fourth of a second. All that’s required is a bit of downscaling.
Methodology
My 1080p copy of Eyes Wide Shut weighed in at 14GB, about 159 minutes. At 24 frames per second that’s roughly 230,000 frames. And with each frame a hefty 1920 by 1080, that’s a whole lot of pixels, around four hundred and seventy five billion worth actually.
Assume that each frame has a single dominant color, a color that captures the two million or so pixels of that frame at a glance, and assume that we can determine this dominant color algorithmically. What would Eyes Wide Shut look like if you played it back at normal speed but only saw those dominant colors? A one by one pixel video? The world needs to know such things.
Fear not, oh my young and innocent reader, I have kindly censored potentially offensive bits of all images included in this post.
This post covers my misadventures converting Eyes Wide Shut to a color stream for use on Blot’re. Starting with the video file, I used FFmpeg to extract every frame of the film and Python to process the frames and extract their dominant colors. I experimented with a few different Python color libraries with varying success. Finally, I converted the results into images and posted the entire stream up to Blot’re at around the original 24fps.
The admittedly rough source code for this project is available on Github.
Extracting Frames
The command to extract a single frame from a video (in this case at the five minute mark) using FFMpeg is:
$ ffmpeg -ss 00:05:00 -i "Eyes Wide Shut.mkv" -vframes 1 frame.png
So, run this roughly 230,000 times to extract every frame in Eyes Wide Shut and we should be good, right?
Well I quickly ran into performance problems extracting frames one at a time. For one, ffmpeg has to start and load basic information about the video file for each and every frame. Not too efficient. And not all frames are created equal.
Greatly simplified, the majority of frames do not store an 1920 x 1080 array of pixels, but instead store change information from the previous frame. Only certain frames, called I-Frames in MPEG, can be decoded without reading any additional frames. Reading a non-I-frame requires decoding multiple prior frames, so extracting frames one at a time is very inefficient since the same frame may end up being decoded up to fifteen times.
I could have avoid these inefficiencies by extracting every frame of the video with a single FFmpeg command:
$ ffmpeg -i "Eyes Wide Shut.mkv" frame%d.png
But 230,000 frames converted to 1920x1080 PNGs take up a hell of a lot more space (600+GB) than the original 14GB video file.
Batch Processing
I decided to process the movie in one minute batches to keep the storage requirements low while still using FFmpeg more efficiently.
This comamnd extracts the 1439 frames (as the frame rate is actually 23.976) in one minute of video.
$ ffmpeg -ss 00:05:00 -i "Eyes Wide Shut.mkv" -to 60 frame%d.png
While I was at it, I also scaled the resulting images down to a more manageable 480px.
$ ffmpeg -ss 00:05:00 -i "Eyes Wide Shut.mkv" -to 60 -vf scale=480:-1 frame%d.png
Reasonable amounts of scaling should not effect the dominant color of an image much. And given that some of the libraries I used to extract dominant colors still took around a second to process the scaled down images, this scaling was pretty much required.
Determining Dominant Color
I tried five approaches, using three Python libraries to determine the dominant color of each frame:
- Average every pixel in the frame.
- Color Thief library.
- Normal Colorweave library.
- Kmeans Colorweave.
- ColorCube library.
Of those, only the average, ColorThief, and normal Colorweave produced anything worthwhile. I may have been using ColorCube wrong, but it just could not handle the images I passing in, especially dark frames.

It does look like shit.
Dark frames were problematic for the other libraries as well.
Additionally, Colorweave in k-means mode produced almost identical results to average, so I’ve omitted it from the samples below.
Let’s look at how the three remaining methods fared.
Frame One
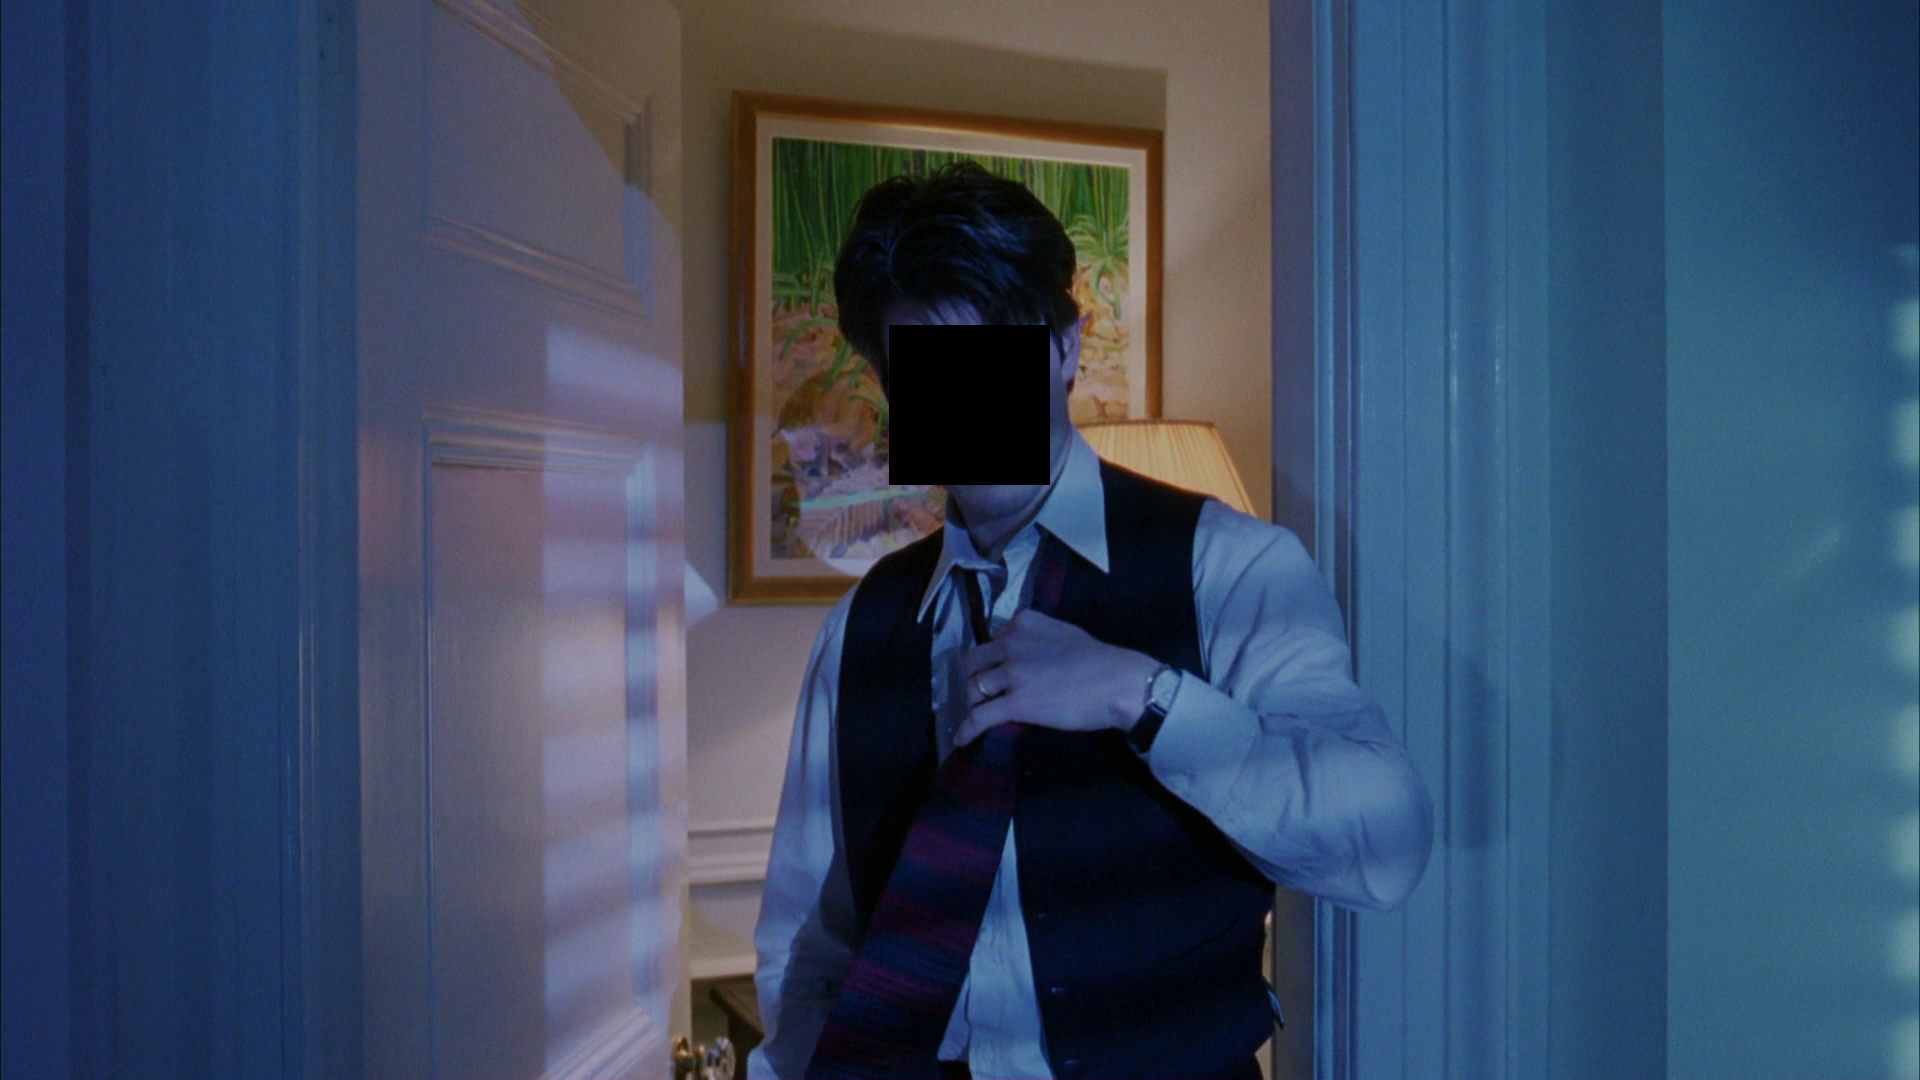
It’s all a dream, isn’t it?
This frame is a classic example of color temperature in Eyes Wide Shut. Throughout the film, almost all interior lighting is yellowish while outside light is blue. Blue dominates this frame.

Left to right: Average - #394a62, ColorThief - #384d6b, ColorWeave - #294f70
The three libraries produced pretty similar results with this one. ColorWeave selected the lightest and most vibrant color, a preference that held for other frames as well.
Frame Two
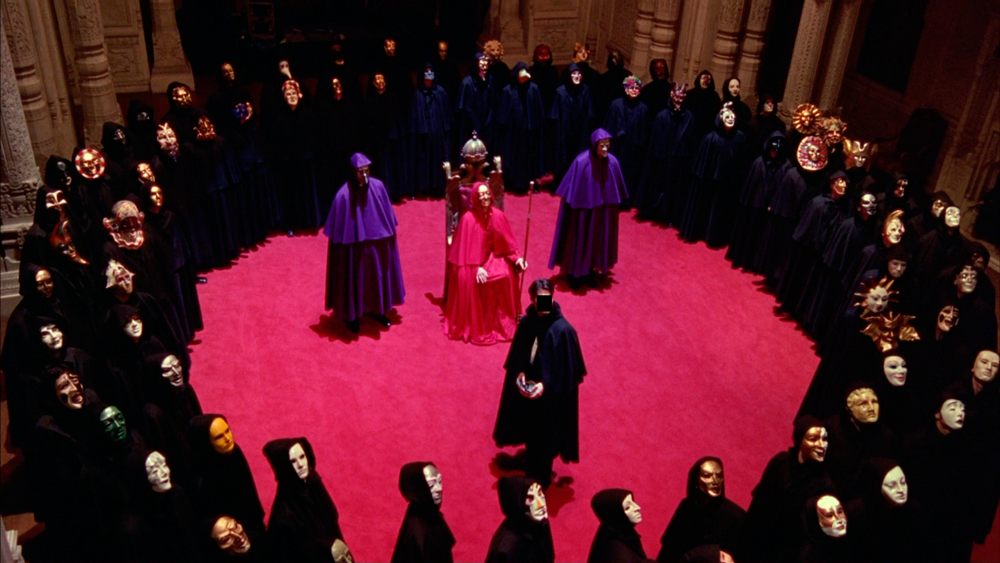
Masquerade! Paper faces on parade!
It’s pretty clear that red dominants this frame, taking up the entire center, but there’s a good deal of black from the cloaks as well.

Left to right: Average - #421823, ColorThief - #b63359, ColorWeave - #ba3066
ColorThief and ColorWeave both identified the red carpet as the dominant color, with ColorThief selecting a darker red from the edge of the carpet, while Colorweave seems to have selected the pinkish, more brightly lit center section. Average also produced a red color, albeit a much darker one, as the black cloaks muddied up its result.
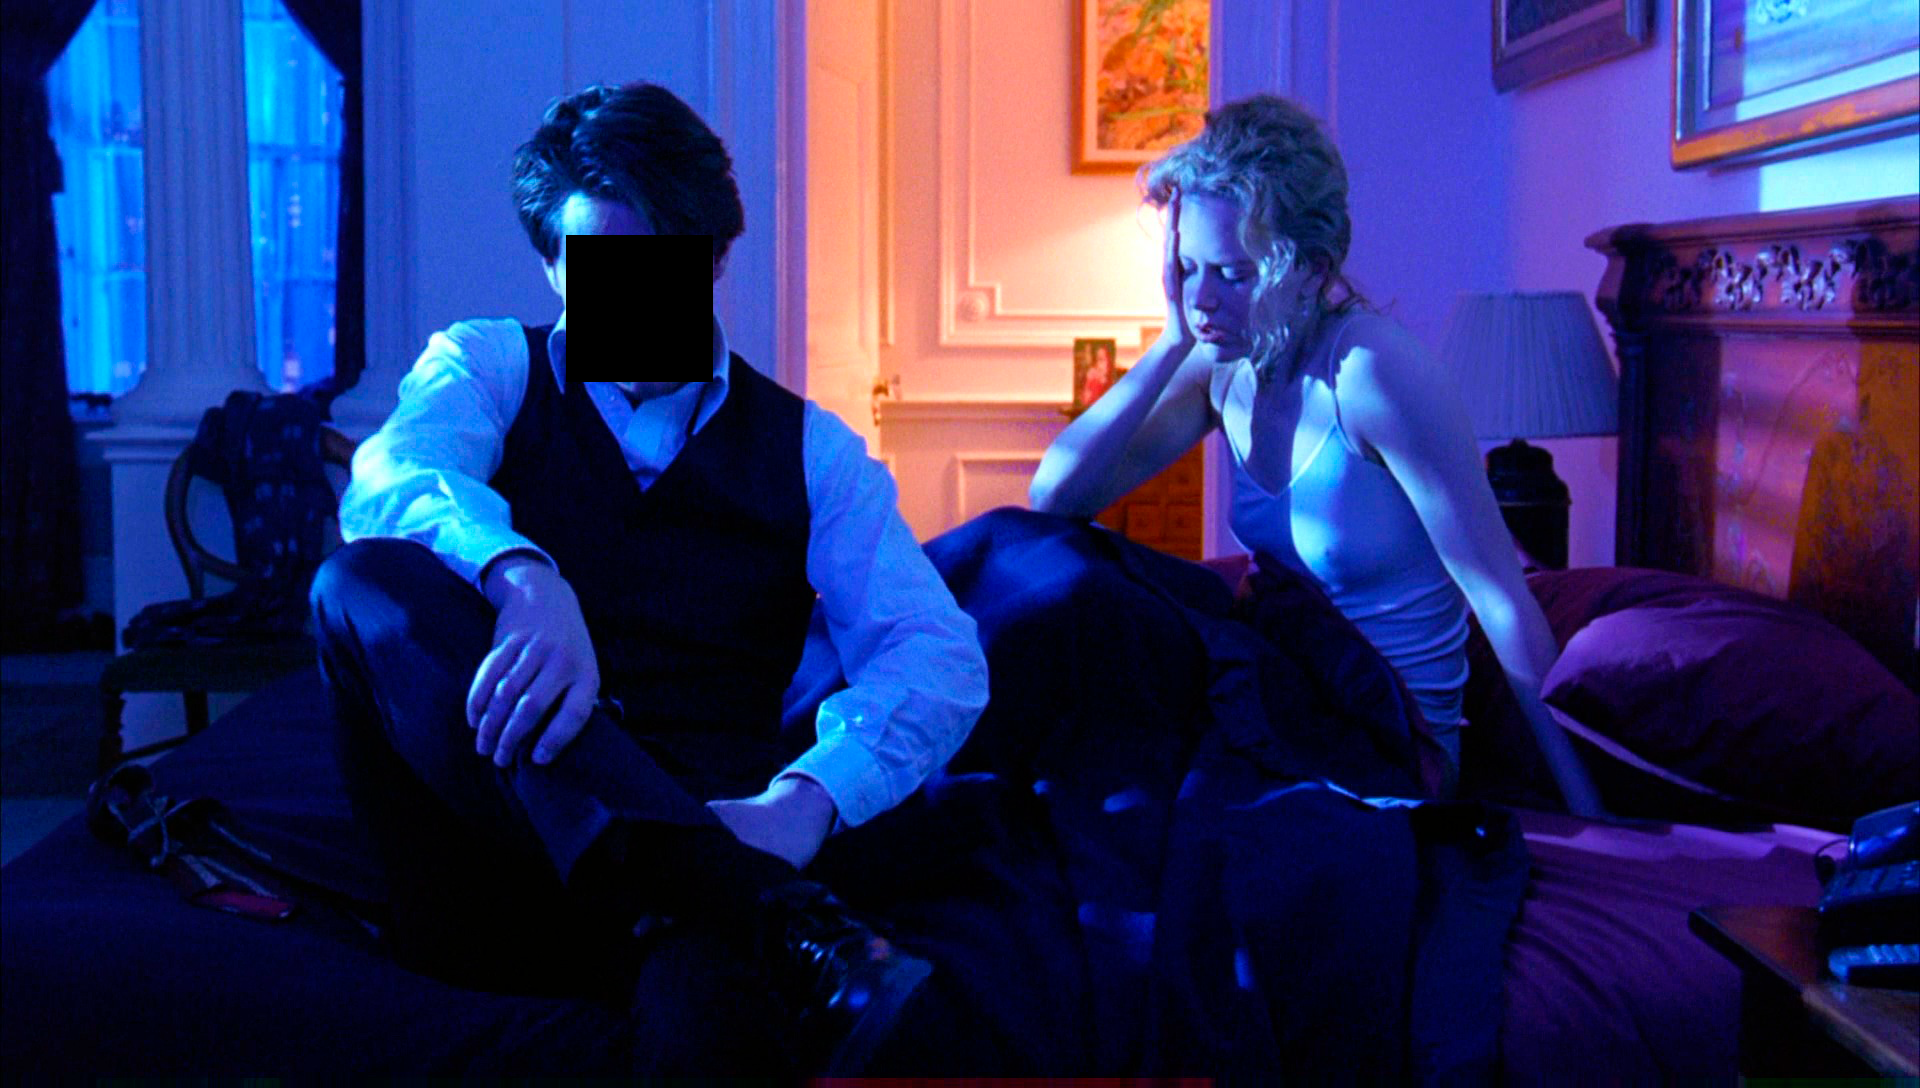
Frame Three

GOTTA GET A GRIP!
One last sample, this time an interesting mix of blue foreground and yellow background. For humans, blue dominants the frame because you are immediately drawn to Nicole Kidman’s face. Visually though, I would say the yellowish background actually takes up more space.

Left to right: average - #5b433f, ColorThief - #6e504b, ColorWeave - #846465
Yeeaah… I’m not really sure where brown came from, perhaps the shadows or the hair, but at least the three were in agreement. Not the best results.
This frame highlights the limitation of my approach though: perception. The perceived dominant color of an image greatly depends on its subject, composition, the relationship between colors, and a number of other difficult to quantify factors.
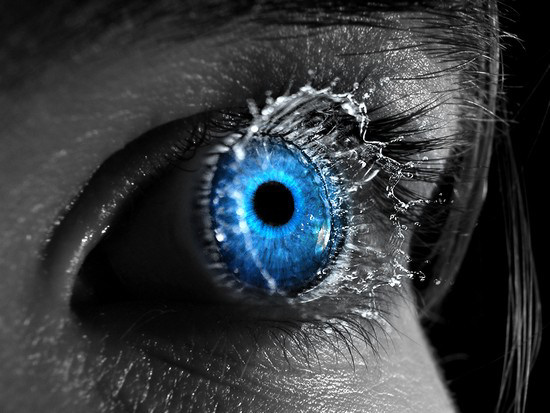
It’s funny how the colors of the real world only seem really real when you viddy them on the screen.
If you only look at area, gray dominants the above image. But blue is the perceived color, at least for me. The centered, blue eye contrasts with the gray surroundings, making it stand out even more, and humans are naturally drawn to shapes such as eyes and faces. I did not find any libraries that tried to determine the perceived dominant color of images, but it would be interesting to investigate this further.
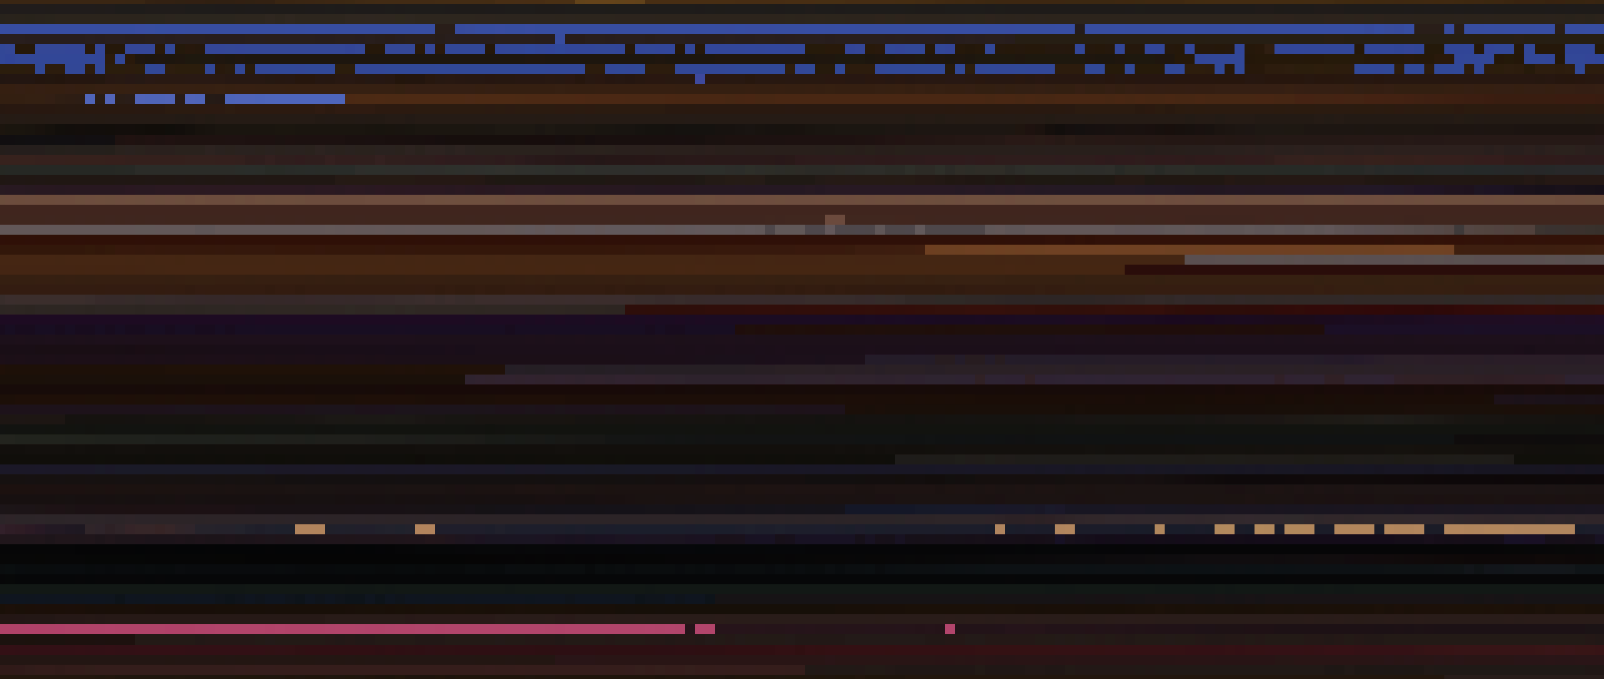
All Together Now
I ran each method against every frame in Eyes Wide Shut to extract the 230,000 dominant colors of the film. I saved this data as Json and used the script from my Moby-Dick post to convert the data into images, one pixel per frame, left-to-right, eight hundred pixels wide and about three hundred pixels tall.
ColorThief

I’m not a fan of what ColorThief produced. The library seemed to lock into certain shades, and frame to frame color changes were very abrupt and indecisive. The result is dark, blocky, and ugly.
ColorWeave

Colorweave has much more noise and variation that ColorThief, producing an even more pixeled appearing result. But I actually find this much more attractive, especially when zoomed in so that you can see the individual pixels/frames.

ColorWeave returned pure white for very dark frames, mainly in the credits and for a few of the nighttime city scenes.
Average

Average produced surprisingly good looking results given its simplicity. And, unlike the other methods, frame to frame color changes were gradual and produced very appealing gradients. It doesn’t hurt that average ran at least five times faster than any other method.

Eyes Wide Shut is probably a particularly good fit for average. It’s mostly long shots with slow camera movement, which produced nice gradients, and many scenes are tinted various colors. The results are still dark, but not as dark as you might expect.
I suspect that more conventional films would produce less appealing results. It’d also be interesting to see what these scripts produce on a film like Requiem for a Dream, which also features dramatic use of color, but is the cinematic antithesis of Eyes Wide Shut (and is about as subtle as a striptease by Nikita Khrushchev).
Average produced my favorite image viewed at 100% magnification, but I love ColorWeave’s result zoomed in.
Piracy For a More Colorful Age
Me: There is something very important we need to do as soon as possible.
You: What’s that?
Me: Fucking post this color stream to Blot’re.
Could Blot’re play back the Eyes Wide Shut color stream at near realtime speeds? Yes, yes it can, although it remains to be seen just how many of these streams the server can handle. A colorful DOS attack if you will.
You can find the stream here. The logic for pushing the stream to Blot’re is pretty simple, so I’ll just quickly overview it.
Client Registration
I used the Blot’re-cl-framework to create a new, disposable client application in four lines of Javascript.
var BlotreCl = require('blotre-cl-framework');

BlotreCl({
    name: "Vid're",
    blurb: "Viddy well."
}).then(start);
This uses saved client data or registers a new disposable client app with Blot’re. New clients prompt the user to redeem a one time code. Once the user has redeemed this code on Blot’re, the client app is authorized and can exchange its credentials for an access token. Blot’re-cl handles all these steps internally, returning a promise to a fully authorized client application.
start reads the Json color data for Eyes Wide Shut. The data is stored in RGB array which must be converted to hex for Blot’re.
var start = function(client) {
    var data = JSON.parse(fs.readFileSync('eyes-wide-shut-average.json')).map(toHex);
    getTargetStream(client)
        .then(function(stream) {
            post(client, stream, data);
        });
};
getTargetStream gets or creates a Eyes Wide Shut stream for the current user.
var getTargetStream = function(client) {
    return client.getStream(client.creds.user.rootStream)
        .then(function(rootStream) {
            return client.createStream({
                name: "Vidre",
                uri: rootStream.uri + '/vidre'
            });
        })
        .then(function(parent) {
            return client.createStream({
                name: "Eyes Wide Shut",
                uri: parent.uri + '/eyes+wide+shut'
            });
        });
};
Streaming Updates
post opens a send/response websocket to Blot’re and starts streaming colors over it. Again, the logic is almost identical to the function I used in Moby-Dick. Since that post however, I added the getWebsocketUrl method to the Node Blot’re.js library to get the correct websocked Url based on configuration.
var post = function(client, target, data) {
    var ws = new WebSocket(client.getWebsocketUrl(), {
        headers: {
            "Authorization": "Bearer " + client.creds.access_token
        }
    });

    var i = 0;
    var postUpdate = function() {
        if (i >= data.length)
            i = 0;
        ws.send(JSON.stringify({
            type: 'SetStatus',
            acknowledge: 'error',
            of: target.uri,
            status: { color: data[i++] }
        }));
        setTimeout(postUpdate, (1 / 24) * 1000);
    };

    ws.on('open', postUpdate);

    ws.on('message', function(x) {
        var result = JSON.parse(x);
        if (result && result.error)
            console.log(x);
    });
};
One other difference is that all messages are sent with acknowledge: 'error'. This tells Blot’re to skip sending success acknowledgments and only send error response messages to the client. For rapid calls to SetStatus, this reduces the overhead on the client and on the server.
Tonight? Tonight I’m watching movies on Blot’re at 14kb/s!
The gif is only 12fps so it doesn’t capture the full effect. Here’s the actual stream, streamed to Blot’re at nearly the original framerate from a Raspberry Pi. I used color data from average because of the smooth color transitions.
Kind of mesmerizing actually.